
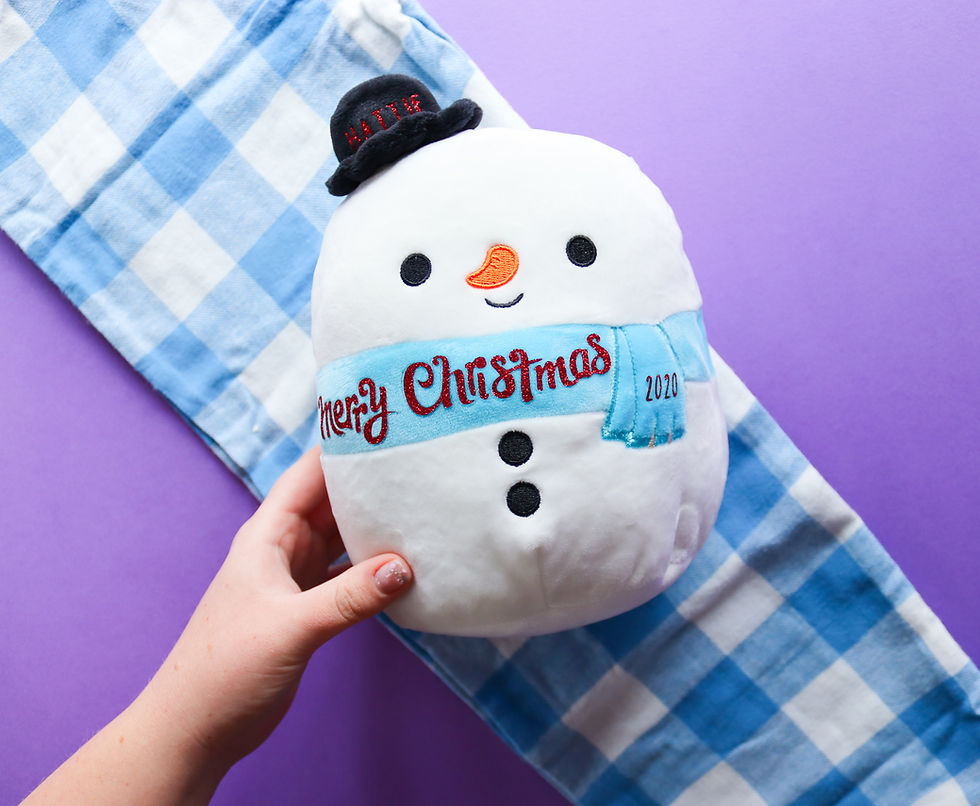
DIY PERSONALISED CHRISTMAS SOFT TOY GIFT
- Emma Jewell

- Dec 23, 2020
- 1 min read
Updated: Nov 28, 2022
Make a soft toy into an extra special gift using Iron-on and the Easy Press mini to make it super personal!
Add a date and a name, to give a furry friend that extra special something!
YOU WILL NEED:
-Cricut Joy , Explore or Maker
-Baking Parchment
STEP ONE:
In Cricut Design Space add the images and writing you would like to use to the Canvas. You can use my project above as a guide.
Then resize all images to fit onto your soft toy.
STEP TWO:
Click Make it and make sure to mirror your images.
Choose glitter iron-on from the materials list.
STEP THREE:
Place a sheet of the iron-on shiny side down onto the mat, ensure that all of it is stuck down. Then load it into the machine and start cutting.
STEP FOUR:
Once cut use your weeding tool to weed away the excess vinyl, leave only your images stuck to the carrier sheet. Carefully cut up the carrier sheet, so that all of the images are individual pieces.
STEP FIVE:
Use the mini-press on the second heat setting to press each image onto the soft toy, keep the mini-press moving at all times. Cover the soft toy with a sheet of baking parchment to protect it.
Be careful to keep fingers out of the way!
Then give the soft toy a cuddle for going through such an ordeal!
*This blog post contains affiliate links


شيخ روحاني
رقم شيخ روحاني
الشيخ الروحاني
الشيخ الروحاني
شيخ روحاني سعودي
رقم شيخ روحاني
شيخ روحاني مضمون
Berlinintim
Berlin Intim
جلب الحبيب